Russian 3D artist Egor Belyakov shows the insights of his new project – Endless Journey. Most of the scene is done in Blender.


Intro
Hi, my name is Egor Belyakov, I am 20. I was born in Yoshkar-Ola (Mari El Republic, Russia) and I also live here. When I was 14, my friend told me that there was an opportunity to create items for Team Fortress 2 on Steam. That time it didn’t really work out but I started doing 3D, not so regularly though. I began learning from Youtube as many people do. I also used to make 3D models for games, but I changed my mind and now my main focus is art.
As for my future plans, I have been nourishing one long-term project I don’t feel like sharing publicly yet.
Right now I am participating in a few freelance projects when I have free time. This year I am also going to start searching for a job in 3D after graduating from the University.
In Search of Inspiration
I began working on this scene more than a year ago, then took a break and only recently was able to finally finish it. This is why all the elements you see are made differently. I was inspired by my childhood memories about train journeys we made with my mum on a way to the summer camp. For some reason, I have an unexplainable affection for railway vehicles and distant trips.

Searching for good solutions, I had been surfing through websites like Pexels, Unsplash, Pinterest. My aim was to share the atmosphere and spirit of coziness I feel when I start thinking about a train journey.
It took me a while to decide where I wanted my scene to be rendered. Originally, I was going to do it with UE4, but EEVEE had become so user-friendly that my choice fell on it. Using EEVEE is really convenient because there you don’t need to send the scene between applications – you can do modeling in Blender, mold masks, put shaders in a node editor and see the changes in real time. What is more, EEVEE nodes are compatible with Cycles! I think EEVEE is user-friendly and renders quite good pictures. I was really lucky to find it I am going to continue using it.
The Project Start Point
Following the references, I decided to start with the car box, then I made beds and small things like towel holders. The props were left for the last moment. I decided to bring a main focus on the window and put a few authentic things on the table. I also was going to place the camera at the corner but decided to move it to the center feeling like it would show the best view.

My Workflow
In general, my pipeline looks like that: I make a HighPoly and MidPoly (or a MidPoly only) → do UV mapping → set naming with Simple Renaming Panel addon → export to Substance Painter, bake maps according to their naming and do texturing → import the textures and adjust the materials in Blender → ????? → PROFIT
Some items like the cage or the suitcase and hat came to my mind at the last minute. Well, originally this scene was going to be more simple and dark. The tea glasses were borrowed from my friend Misha Kovyatkin.

Here’s my asset structure and export settings
Making a Fabric
Yup, I guess fabric materials is not my strongest point. Most of the clothes were simulated in Blender and finished with the Sculpt Mode with mask brushes. Probably, a better solution would have been to make the simulation in Marvelous Designer. I also used Displace Modifier with procedurally-generated noise to add variety.

For additional detalization, I often use a Normal Map for pleats.
Creating Materials
A lot of meshes were textured in Substance Painter. Their Blender materials are just Principled BSDF with PBR maps and correction nodes (mixRGB, ColorRamp, RGB curves). For the fabrics and some objects like bottles, I made materials only in Blender using procedural and seamless textures (I often took textures from textures.com or straight from Google) and painted masks in Texture Paint mode. I created a few simple smart materials in Substance Painter and used them for texturing the walls and other basic objects. I also used a set of filters to fix the textures and make them have the same style.


PBR maps were automatically imported to Blender with Node Wrangler addon. Later, I improved the materials in Blender by adding some details where the objects would better fit.
Adjusting the Light
The setup was quite simple:
- An HDRI map from HDRI Heaven
- A strong bluish source of light (area type) to light the scene from the outside and get the soft light from the window
- A weak point light to add some warm light from the camera side
- A few hardly noticeable point lights with custom distances to illuminate the dark places
- A Point Light and a Spot Light with a wide angle to create the light from the lamp
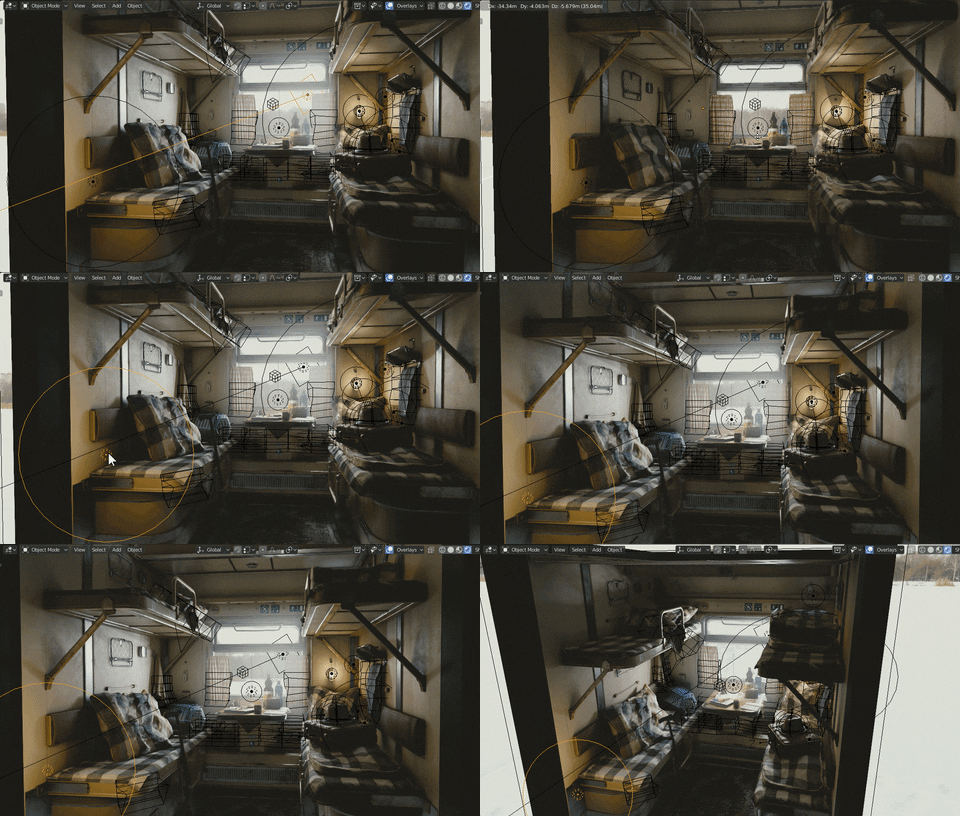
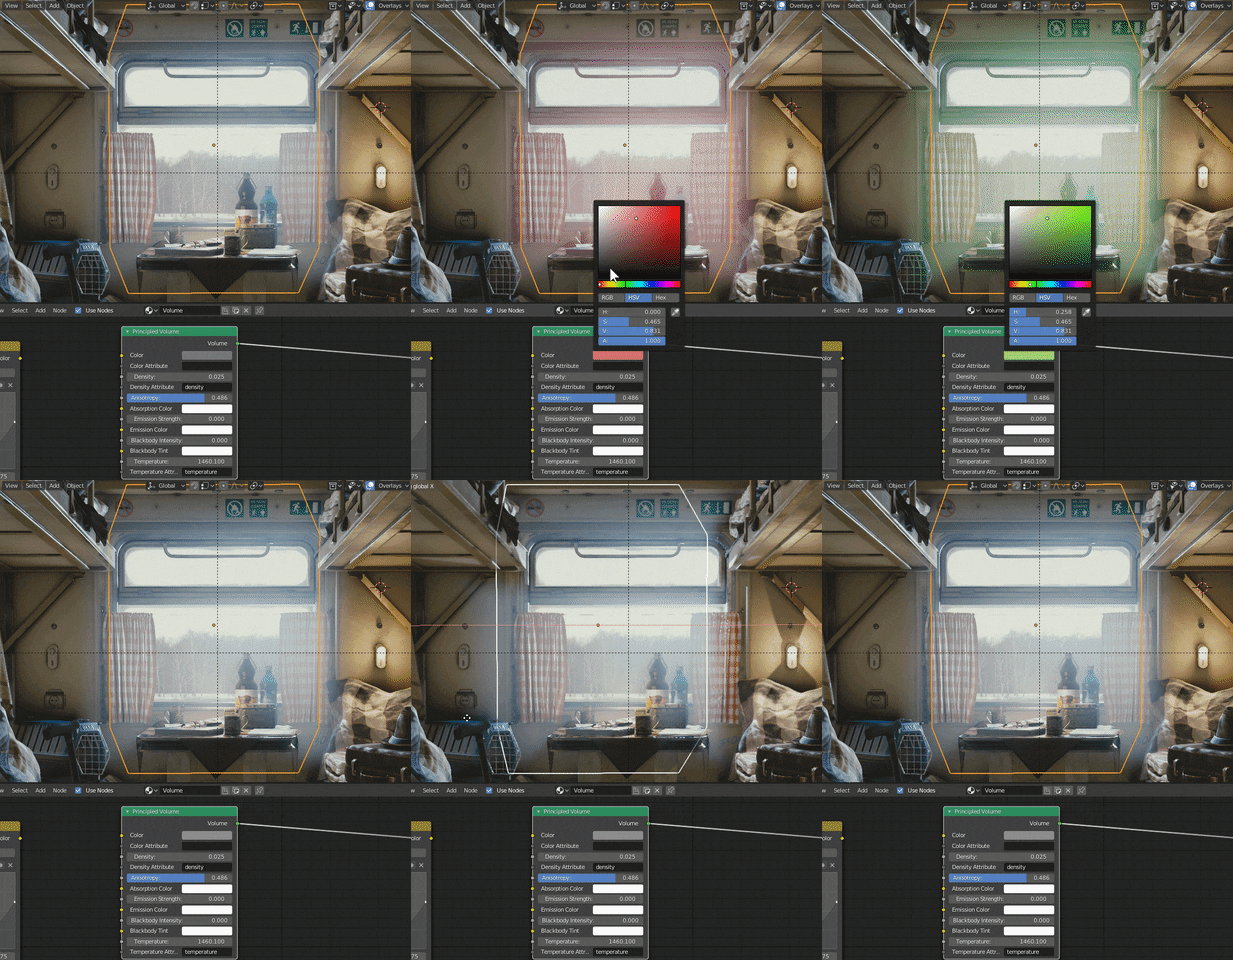
I also set a cube with Volumetric material behind the window. I believe that it improved the lighting.


What also improved my lighting was Global Illumination (Irradiance Volume in Blender). I baked the Indirect Lighting with HDRI map (with decreased brightness) and a dark surface from the camera side. I used bounding boxes to avoid the overexposure in the corners (it appears because basically the walls are crossed planes). Finally, I added a color correction and a bit oversaturated Ambient Occlusion.


I also made a Coub. The animation was created with horizontally blurred HDRI map, composed from a few environment maps. Cloth movements were done with Lattice Modifier.


Useful Tips
In general, the pipeline was familiar to me. I also quite easily adjusted to the new version of Blender. There was nothing difficult in a technical sense. However, I tried a lot of ways for color correction and probably that’s the thing that could be better.
I don’t consider myself as the person who has a right to advise, but there are the things I have learned for myself:
- Don’t be a stubborn perfectionist
- It is useful to have a scratch-pad to record your midnight ideas
- Don’t bother about the technique where no one sees it
Egor Belyakov, 3D artist
Interview conducted by Kirill Tokarev
© Egor for 80lvl, 2019. |
Permalink |
No comment |
Add to
del.icio.us
Post tags: 3d art, Allegorithmic, animation, Software, Tools
Feed enhanced by Better Feed from Ozh
Source : https://80.lv/articles/001agt-nice-tips-for-creating-a-train-cabin/


